
How to Import Video and Add Playback Button on Your Flash Movie?
Summary
If having downloaded a wonderful video, you want to control the video playing progress completely, stop playing the video in a specific time or add a preface scene for this video, how to do? It is not so difficult; we can use Sothink SWF Easy to realize what you want.
Tools Used in this Tutorial:
Sothink SWF Easy 6.2
Adobe Flash Player
This tutorial will introduce you:
1. How to Import Video into Flash Animation?
2. How to Set Canvas?
3. How to Add Playback Button for This Video?
4. How to Create a Preface Scene?
5. How to Preview This SWF?
Part One: Import Video into Flash Animation
1. Launch Sothink SWF Easy and create a new Flash animation from a blank document.
2. Click button “Import” on Toolbar to open a dialog, and then pick up a video file from the folder to import into the canvas.
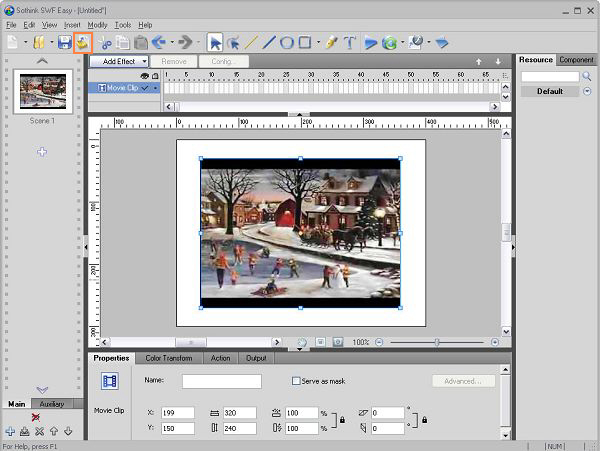
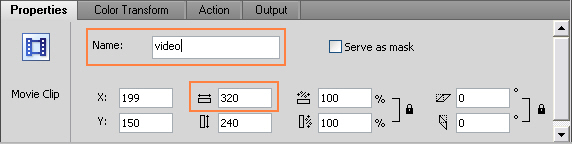
3. Select the video on the canvas, and the Properties panel turns to be the one for the video. Under tab "Properties", input "video" as the name of the video. Remember the video's width, which is 320px.
Part Two: Set Canvas
1. Click an empty area on the canvas and then the Properties panel turns to be the one for the whole animation. Go to Properties panel, under tab Properties, set the Flash's dimention according to the video. You may directly input the value or drag the slider besides Width and Height. Here, set Width to be 320px. Drag the video to fit the canvas and let them be like this:
.jpg)
Part Three: Add Playback Button for This Video?
1. Go to panel “Resource”, input the text “button” in the search field, and then press down the key “Enter” on the keyboard or click the button “Search” besides the text. The relative search result will be listed under the search field. You can drag the scroll bar to view all the result resources.
Here we select the button named "a3" and "a1".
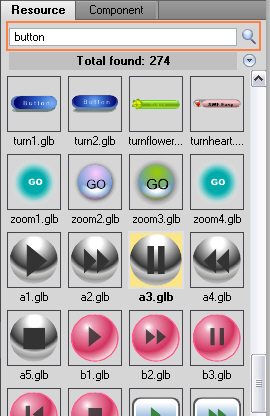
Note: If you don't find much resources in your SWF Easy program, you may download more free Flash Resources from SWF Easy web page.
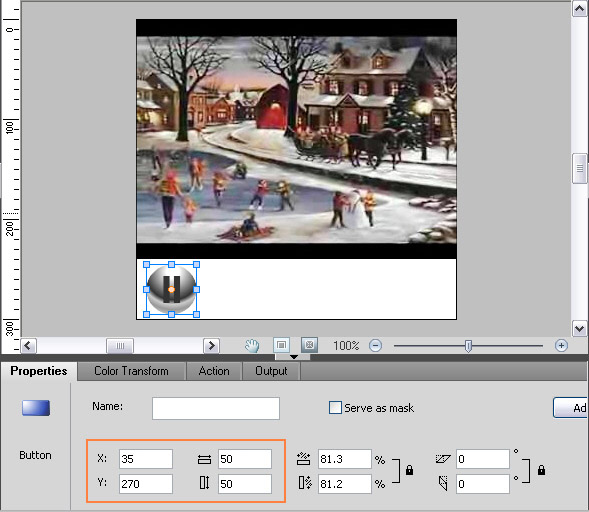
2. Drag the selected button "a3.glb" to the canvas. And then choose the button, set its properties in the its Properties panel.
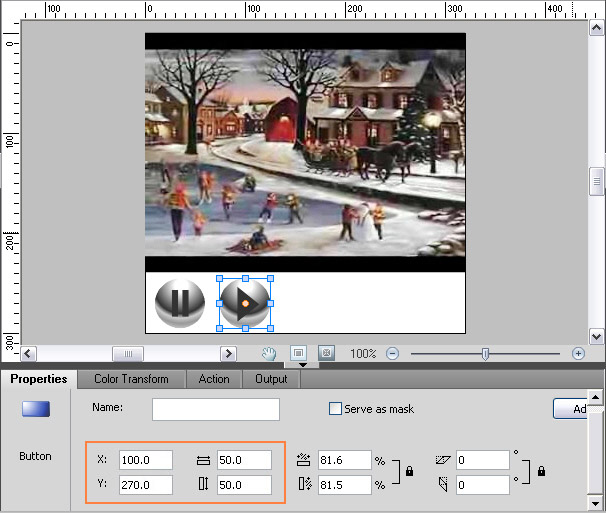
a) Under tab "Properties", set the position of the button to be: X: 35, Y: 270. And set the dimension of the button to be: Width: 50, Height: 50. For the settings, it's both OK to input the value directly and drag the edit box to modify.
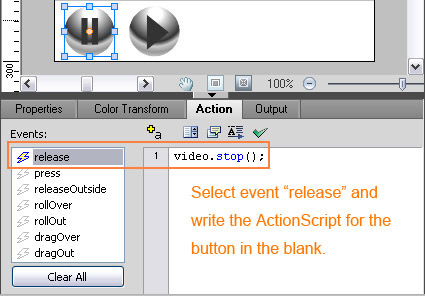
b) Click tab "Action" to add action for this button. In the events list, choose the option “release”, and then input “video.stop();” in the blank custom field. The ActionScript added here means that when click the button in the Flash animation, the video, of which name is video, will stop.
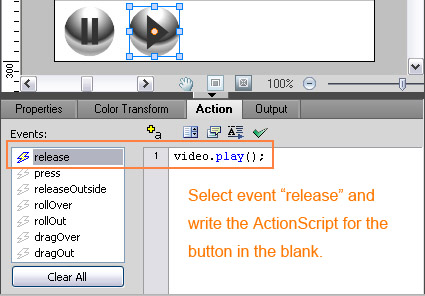
3. Drag another button "a1.glb" to the canvas. Set its properties, and input its ActionScript as “video.play();”, which means that when clicking the button in the Flash animation, the video will play.
Part Four: Create a Preface Scene
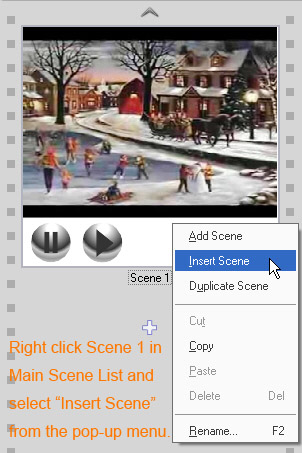
1. Go to the Main Scene panel, choose “Scene 1”, and then right-click to pop up the context-menu, and choose the option “Insert Scene”, a new scene will be placed above “Scene 1”. The new scene names itself as "Scene 2".
2. New scene is placed in the canvas; click the button “Text” on Toolbar to input text in the new scene.
3. Drag a rectangle on the canvas, and then input the text in it. Here we input text "Watch Movie Now...". You can set its properties, like font and size under tab "Format" in its Properties panel.
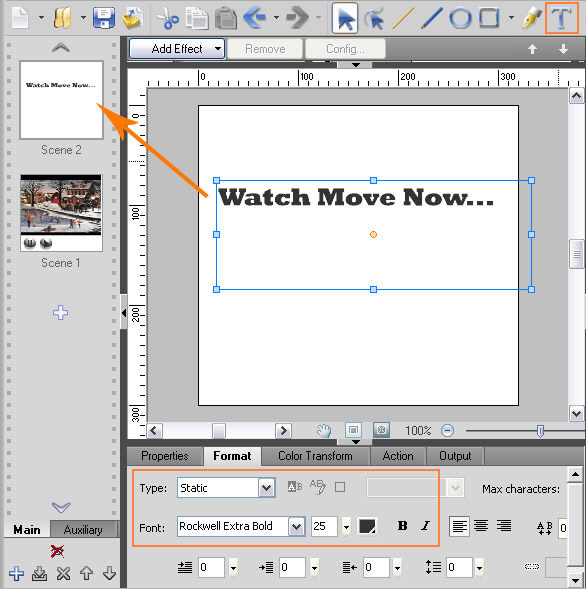
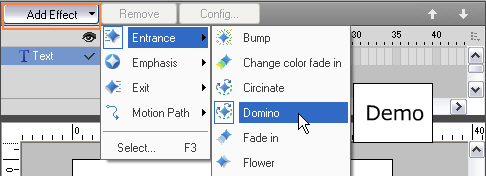
4. Still choose the text on the canvas, click the button “Add Effect” above the timeline. Select an effect from the pop-up list. Mouse over an effect here and you may preview the text effect demo of the effect. Select an effect and the text will be displayed with special effect.
5. Drag another button from Resource panel to the canvas. Here we pick up the button "blue arrow1.glb".
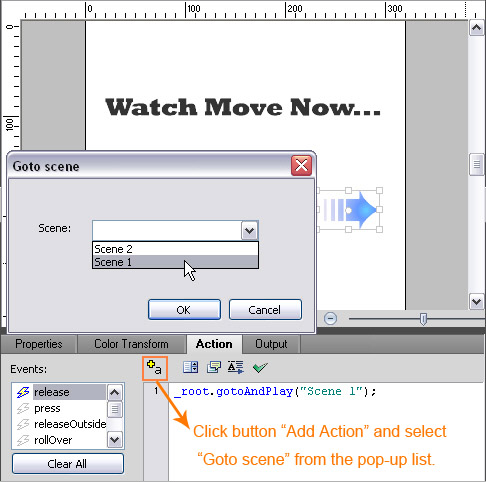
6. Select this button on the canvas and go to tab "Action" in its Properties panel. Choose event "release" and click the button “+a” to pop up a context-menu, choose the option “Goto scene…”. Then it pops up dialog "Goto scene" for you to set which scene will be swithed to when clicking button "blue arrow 1" in the Flash animation. Here we select "Scene 1".
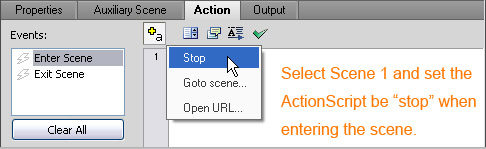
7. Choose “Scene 2” in the Main Scene panel and the Properties panel turns to be the one of Scene 2. under tab “Action”, choose event "Enter Scene" and click the button “+a” to pop up the context-menu, choose the option “stop”. It means when the Scene 1 is finished playing and it is to play Scene 2, the Flash animation stops.2
Part Five: Preview Flash Animation
Click button "Preview" on Toolbar and you may preview the Flash animation created. Check it and modify the Flash animation if needed after previewing.
If you would like to learn Photoshop feel free to check tutorials at FinalDesign Studio.