How to set colors for object? --- Sothink Logo Maker Professional
Steps to set color
Colors panel provides lots of pre-made color schemes. It also enables flexible customization of color scheme. Color scheme is a series of colors, including the pre-made and custom color schemes, which the users can apply to the selected object directly to get the perfect color matching. Follow steps below to set color for object:
- Choose the object on the canvas.
- Apply color from pre-made schemes or custom color scheme
a. Click the arrow on the right of color scheme and switch to pre-made scheme. Hover mouse on the scheme to preview directly on the canvas, and click to apply color to selected object directly. Or eye-drop the favorite color and apply the color to the selected object.

b. Apply color from custom color scheme
Steps to customize color scheme
a)
Six color harmonies are listed at the left side of color panel, including Monochromatic, Complementary, Triad, Tetrad, Analogous and Accented Analogous. You can choose from which to decide your color scheme.
b)
After you decide the combination, roll the black ball or click to input a value to adjust the hues on the color wheel; roll the white balls or input a value to adjust the angles if you choose Triad, Tetrad, Analogous or Accented Analogous.
c) Adjust the brightness and saturation of colors.
d) Adjust the opacity of colors.
e) Click ![]() to expand simple color scheme and click
to expand simple color scheme and click ![]() switch back to simple color scheme.
switch back to simple color scheme.
Notice: Only when color scheme is under connection ![]() can you filter color scheme on color wheel, saturation/ brightness and opacity; When it is under disconnection,
can you filter color scheme on color wheel, saturation/ brightness and opacity; When it is under disconnection, ![]() any change of color wheel, saturation/ brightness as well as opacity will not affect the created color scheme, which will be applied to selected object directly.
any change of color wheel, saturation/ brightness as well as opacity will not affect the created color scheme, which will be applied to selected object directly.

- Choose the object on the canvas.
- Select "Gradient" effect from left effects panel.
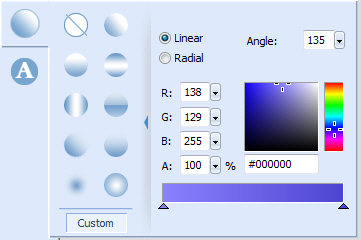
- Click "Custom" button to customize the color.

Check "Linear" option: Create a gradient color from the starting point to the end point in a straight line.
.jpg)
Check "Radial" option: Create a gradient color from the starting point to the end point in a circular pattern.
.jpg)
To change color do one of followings:
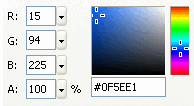
- In the Color palette, directly input RGB or HSV value to set the color.
- Click and drag the cross-hair pointer to find the color you want in the color picker visually.

When choosing "linear" or "Radial", you also can change the gradient color as below : - Use the linear or gradient definition bar. The definition bar appears with a pointer at each end. A pointer looks like a small triangle, representing a color in the gradient, shown as below:
To add a color to the gradient:Click to add pointer Right click to delete pointer
Click on or below the definition bar. There'll be more pointers showing below the bar. Select one, and set a color to it;
To change the colors' sequence in a gradient
Reposition the relevant pointers. To do so, drag a pointer along the definition bar;
To remove a color
Drag the relevant pointer down and off of the definition bar; right click to delete point.
