Sothink SWF Easy - Create a Album
Create a Normal Album
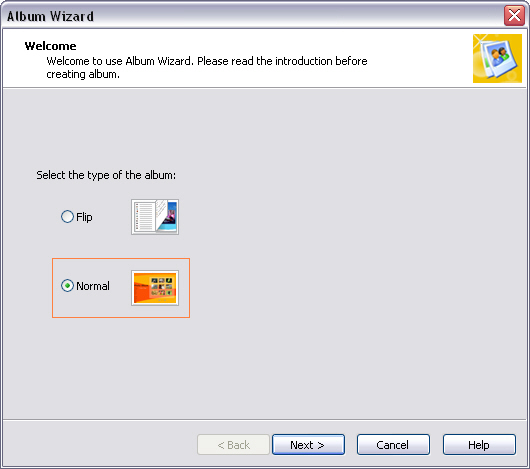
There are two types of album: Flip and Normal in Sothink SWF Easy. The album created from Normal template of Album Wizard is called normal album in this help. In following sections, we will tell you how to create a normal album.
Start SWF Easy. Click "File -->New From Template..." and choose "Album" from the available templates. The Album Wizard will be launched. Choose "Normal" and click "Next" to continue.
Step1: Select Template Type
There are two types of normal album for you to choose: Embedded Photo and External Photo.
Differences between them:
The External Photo type does not store the images into the swf movie. When you upload
the album to web server, you have to upload both the swf and image files. The advantage is that in this type, the size of the swf file is relatively smaller.
If you want to publish the album on web and get a higher speed for people to load the movie, please choose
this one.
If you choose Embedded Photo, the image will be stored into the swf file. That
means the swf file size will be larger than corresponding external photo album. It is
convenient for you to view this kind of album on local computer or send it to others
via email.
Besides the above, Embedded Photo and External Photo have different templates.
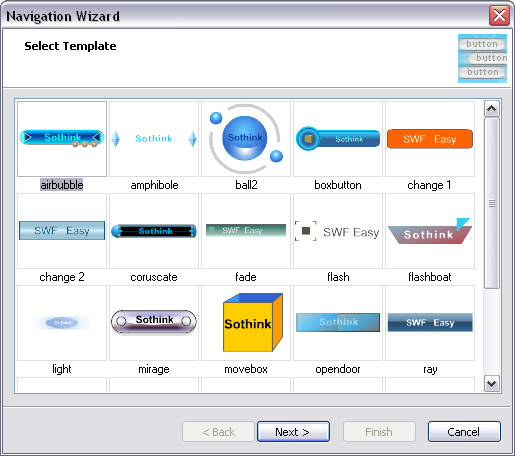
Step 2: Choose a Template
Choose an album type you want and then all templates belonging to this type will be listed. If you want to see all available templates, just check both boxes in front of the two types.
When you check both boxes and all the templates are showed, you need to distinguish them. Since different templates belong to different types, once you select one template, it will generate an album of the corresponding type.
After selecting a template, click "Next" to continue.
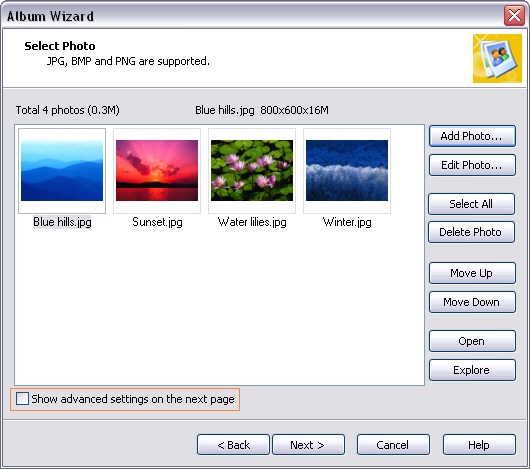
Step 3: Select Photos
In this step, you can add photos to your album. The supported image formats are JPG, BMP, PNG and GIF.
Note: If you apply a GIF image that contains multiple frames, only the first frame is valid for the album.
Add Photo
Click "Add Photo" button to browse to choose the images you have prepared. Pressing Ctrl enables you to choose multiple images. Click "Open" and these images will be displayed in the preview area. On the top-left, the total number and size of the selected photos are displayed, while on the right, the name, width and height of the photo you are currently selected in this window are shown.
Edit Photo
Choose a photo and click this button, and then you will see the dialog "Edit Photo".
Info
In the tab "Info", it lists all the information of this photo. You can add or replace any information as you like, such as description.
Rotate
In the tab "Rotate", it shows the photo in different directions.
Sound
In the tab "Sound", you can choose a sound for your photo. The sound will be played automatically when users view this photo till they go to next photo. The supported format is wav or mp3.
Effects
In the tab "Effects", you can add transition effects to the selected photo. The "transition effects" here refers to display some special effect when transform this photo to next one. The effects include box in, fade in, falling lines, etc.
If you choose more than one effect for a photo, these effects will be shown randomly.
Select All
Click this button to select all photos.
Delete Photo
When you want to remove a photo, select the photo and click this button to delete it from your album.
Move Up/Down
Choose a photo and click button "Move Up" or "Move Down" to change the order of this photo.
Open
Open the selected photo in default picture viewer of your system.
Explore
Open the photo's folder in Windows Explorer and the photo will be highlighted in this folder.
Click "Next" to continue.
(If you want to set advanced settings for the album, such as play style and photo size, please check "Show advanced settings on the next page").
Advanced Settings
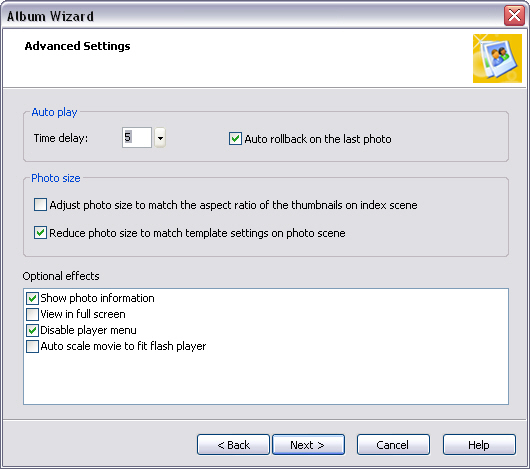
Auto play
Time delay: Set delay time for movie to play.
Auto rollback on the last photo: When playing to the last photo, come back to the first photo automatically.
Photo size
Adjust photo size to match the aspect ratio of the thumbnails on index scene:
Crop the image to fit the ratio of the template.
Reduce photo size to match template settings on photo scene:
If you choose this option, the image will be resized.
Optional effects
List the optional settings for this template. Different templates may have
different options:
- Show photo information:
It delivers photo information in details, such as: Total color, Size, Camera make, Camera model, Date and so on. - View in full screen:
If you check this option, the album movie will show in full-screen. - Disable player menu:
If you check this option, the player menu such as "Zoom In", "Zoom Out" will not show when right-clicking the album. - Auto scale movie to fit flash player:
The scale of the album can be changed automatically to fit Flash player window.
After setting appropriate values, click "Next".
Step 4: Generate Album
In this step, if you are using an "External Photo" template, you need to choose a directory to save your album at first. Then click "Next" to generate the album. SWF Easy will save the album and all image files to that folder automatically. When you publish the movie, you need to upload both the swf file and the image files to your server.
If you are using an "Embedded Photo" template, SWF Easy will begin to generate the album at this step. When finish, you need to click "File --> Publish" to publish your movie. Click here to see publish guide.
Tutorial
SWF Easy Interface
Basic Skills
Quick Start
Effect
Use Resource
Use Component
Export
Publish
How to
- How can I select the elements, which are covered by others?
- How to edit a shape?
- How to edit a button?
- How to set an element as background?
- How to add links to elements?
- How to add links to scenes?
- How to add a preloader to my animation?
- How to add image to my artwork?
- Can I edit image in my artwork and how?
- How to find more resources (Shape, Button, Image, Sound, and etc.)?
- How to publish my animation?